UDP (Low-Code No-Code) - Powered by HCL Volt MX - Primer Series 5/N
Introduction to HCL Leap - No Code - Creating a Form and Other Aspects
As explained in the previous article - we got started on HCL Leap and we discovered how we can access Leap and start creating applications on the same.
In this article we will understand how to use HCL Leap in further detail especially the form part. HCL Leap is very advanced platform which will allow you develop very sophisticated No-Code applications.
Let's delve a little more deeper on HCL Leap which is part of the Unified Development Platform powered by HCL Volt MX.
Forms - Basic Building Blocks
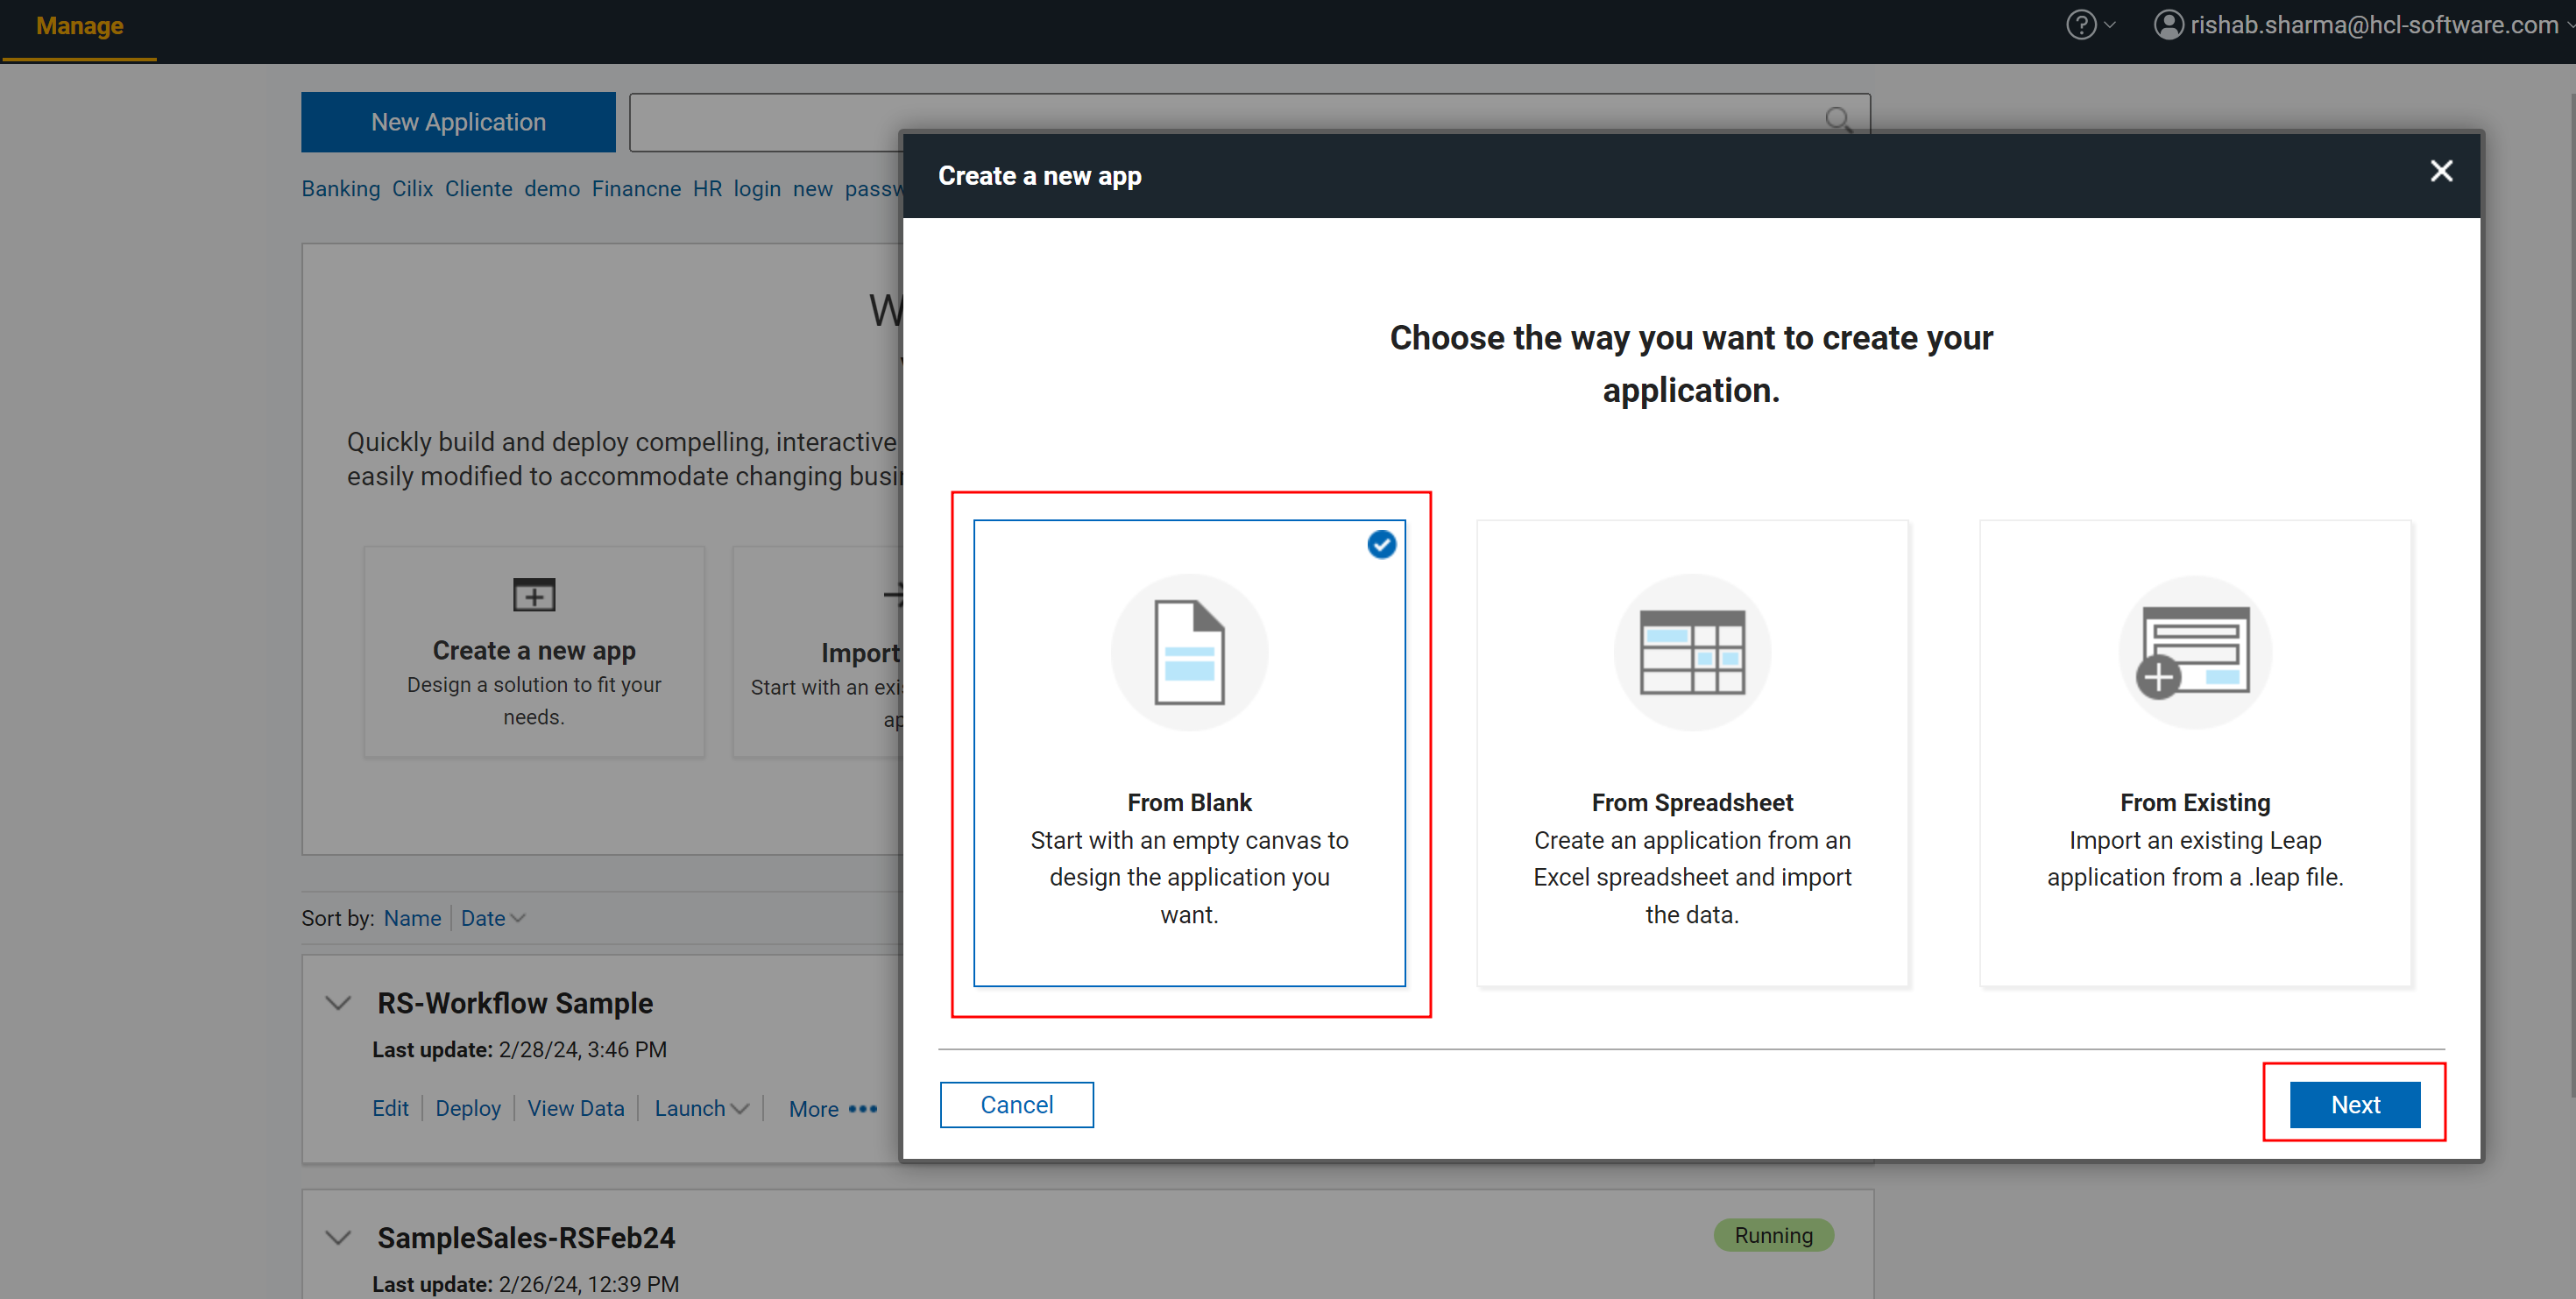
Lets create a blank application to access the Leap Designer.
Phase 1 - Blank Application
Create a Blank Application as show below.
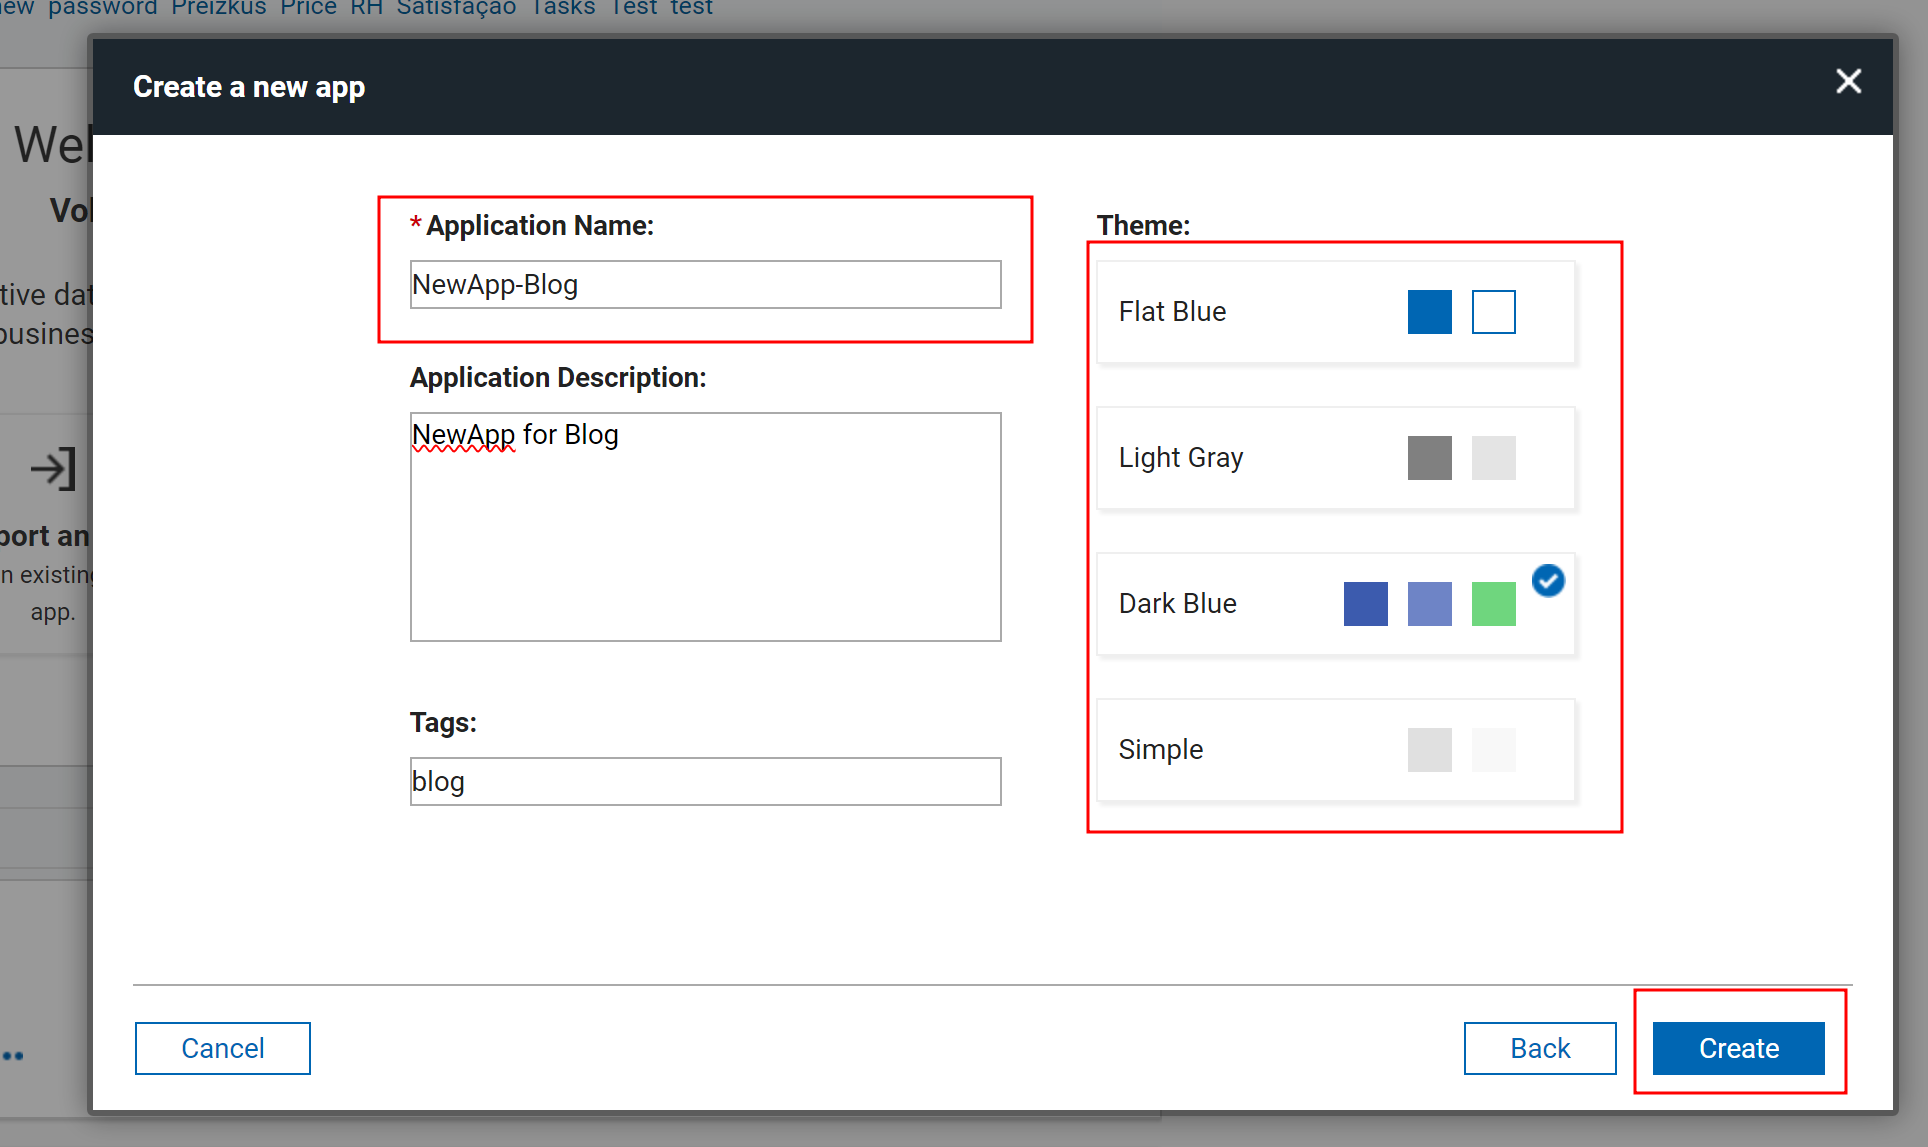
Phase 2 - Name and Theme
You are provided options to name you application and choose a theme.
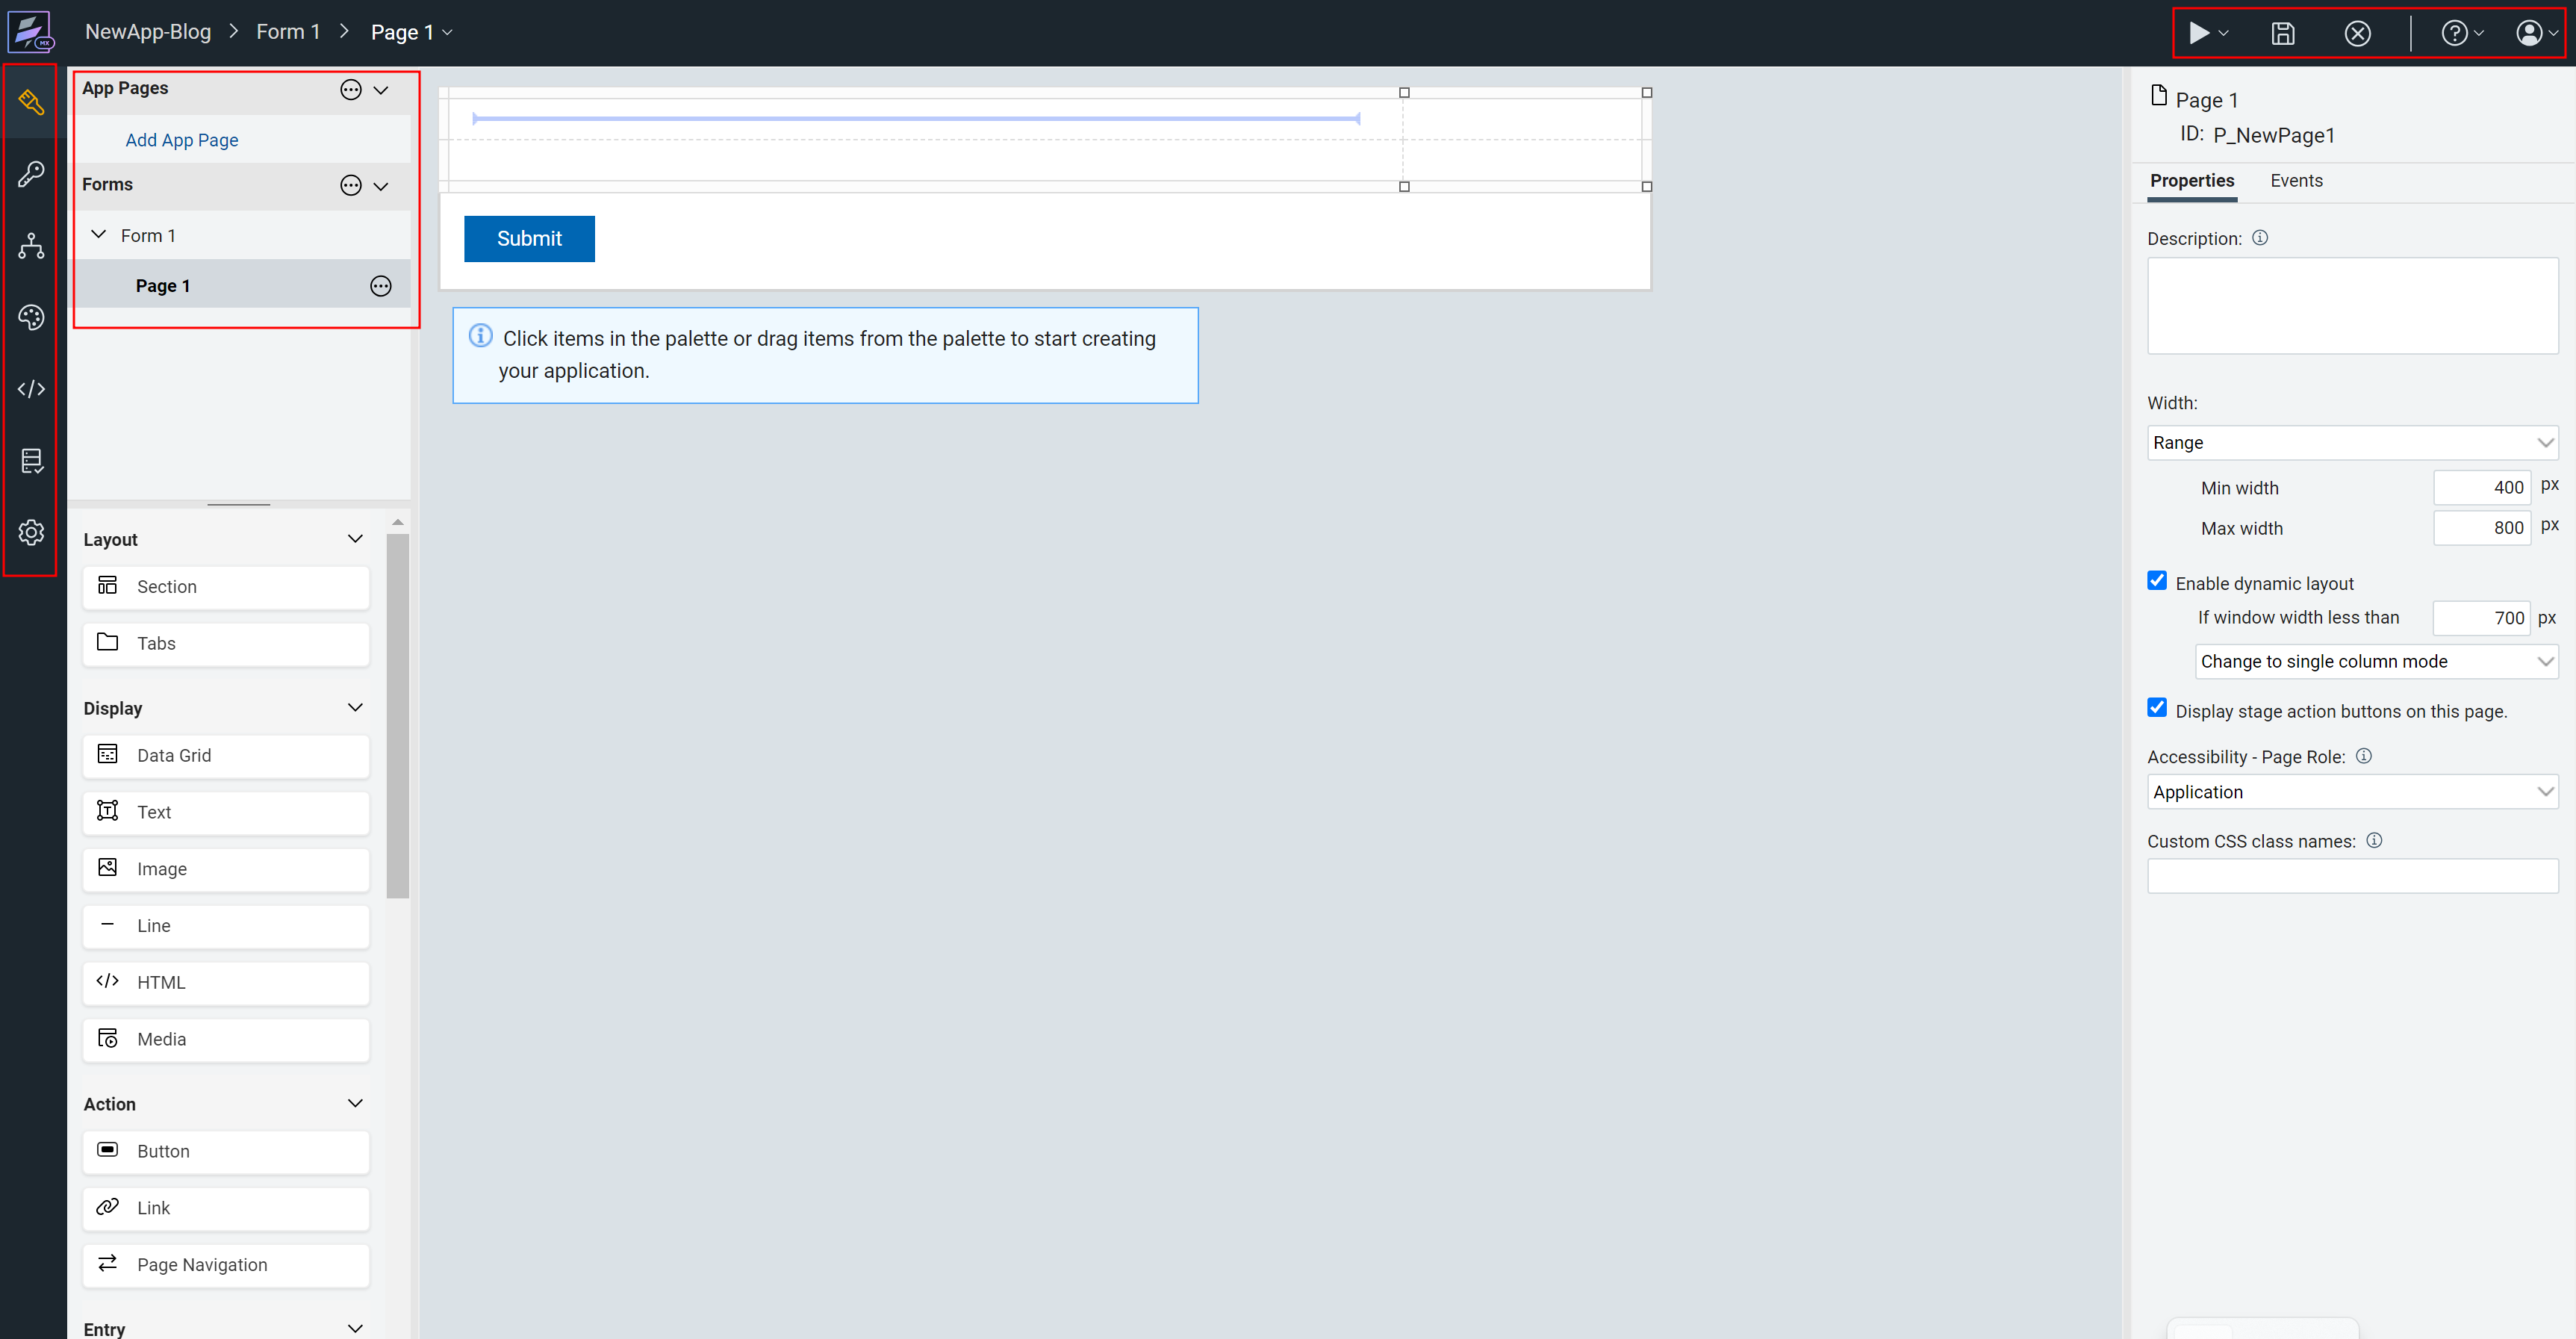
Phase 3 - Launch Designer
Clicking Create will take you directly to the designer. There are options to access workflow, stages, styles. This is not a tutorial but there are plenty of options. You will also have a palette of controls and also Save and other options.
Phase 4 - Form Controls
We can now design a form using various controls. You can use Section to organize you items better. HCL Leap will automatically create the backend database needed to store values from this form. A sample form is presented below.
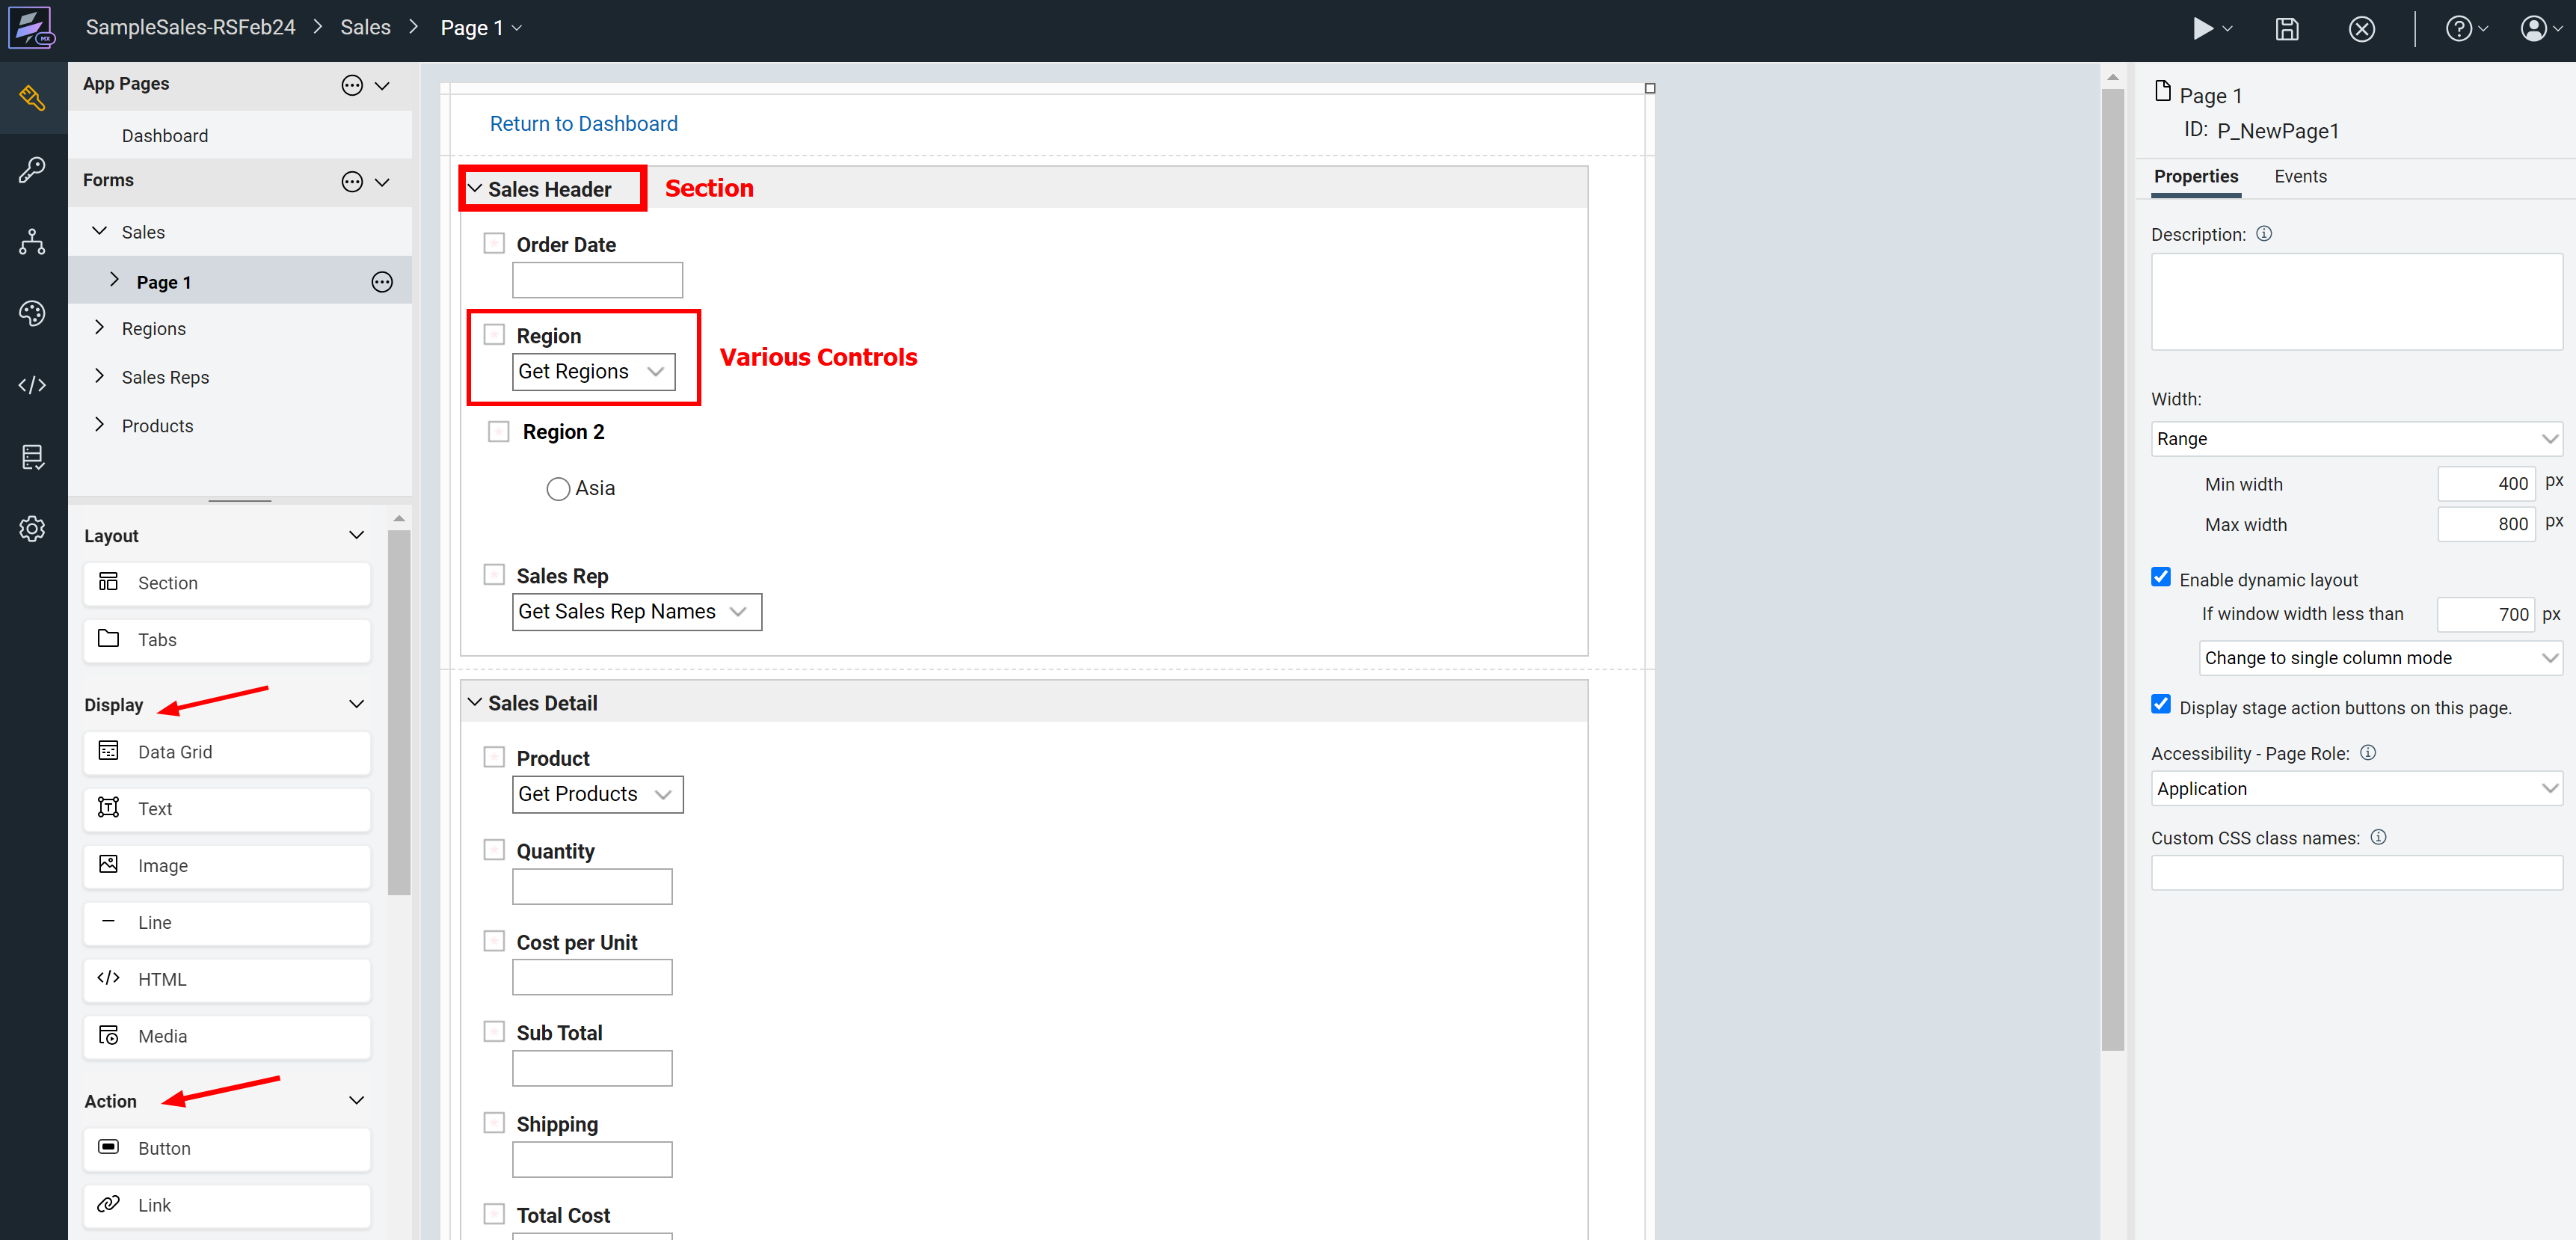
You can observe the various sections and layout controls.
Phase 5 - Data Model
You can see the data model for this form is already populated and data is stored in the same. No need to design the database and the object model HCL Leap can do that for you.

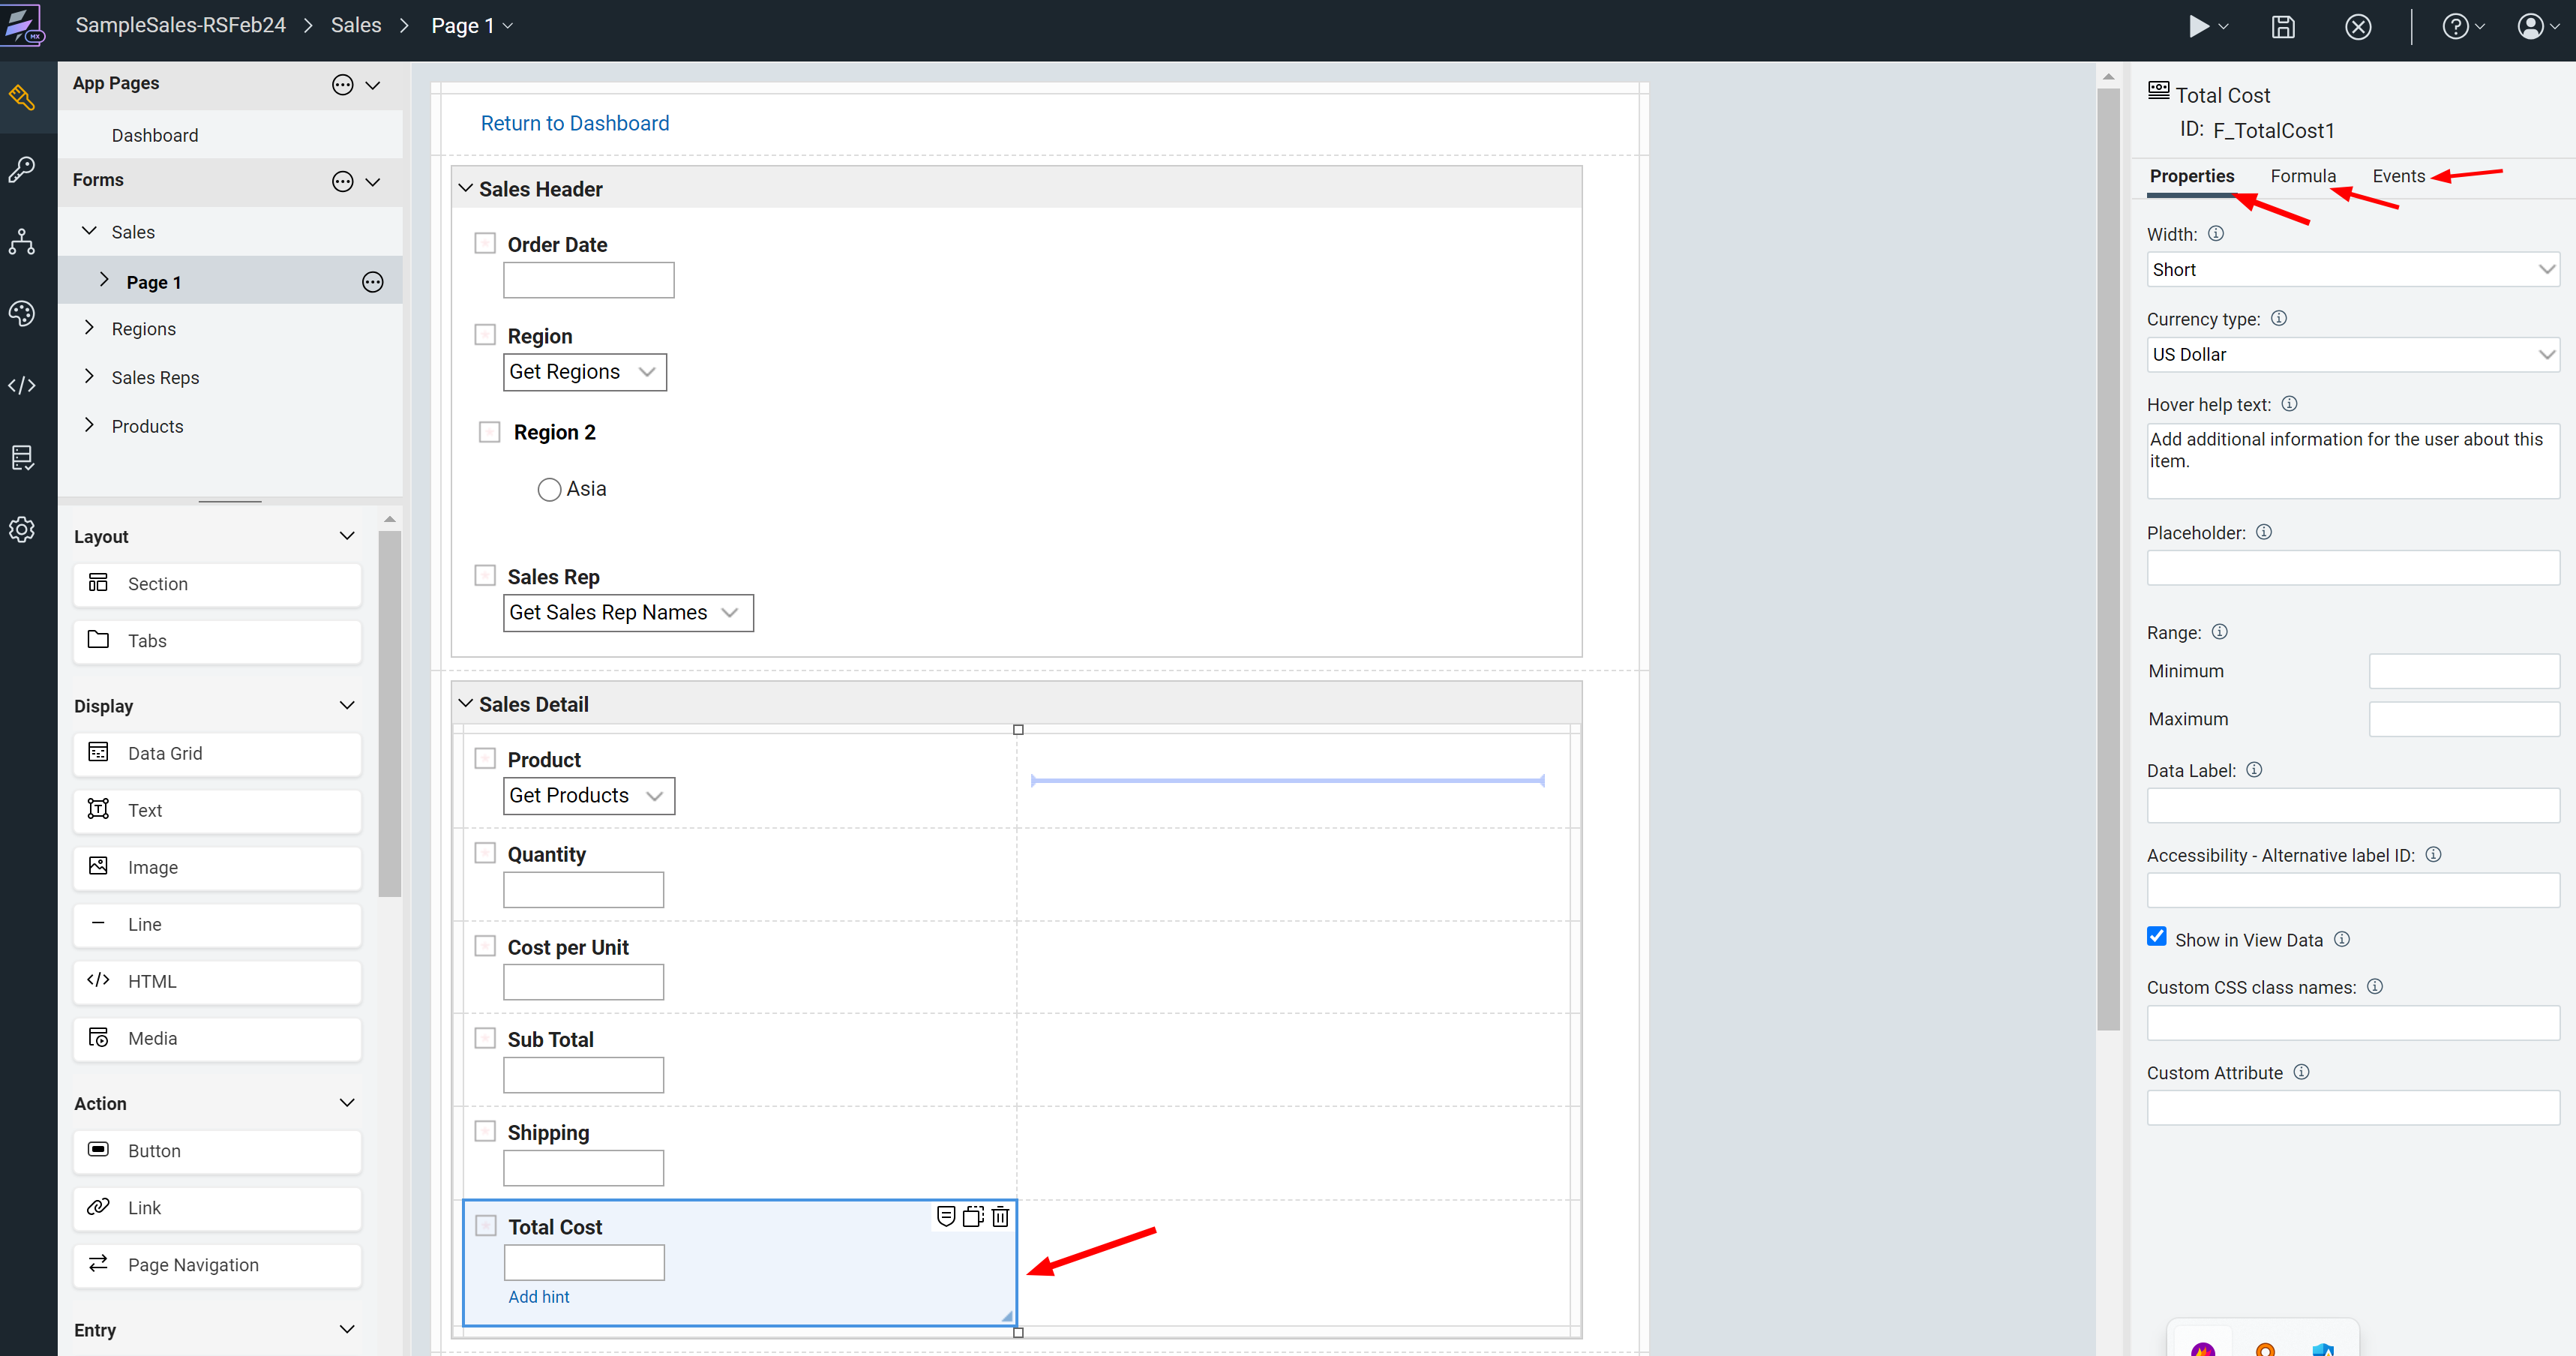
Phase 6 - Field Properties
You can see that any field you add will have properties to adjust the appearance and other aspects. You will Formula and also Events.
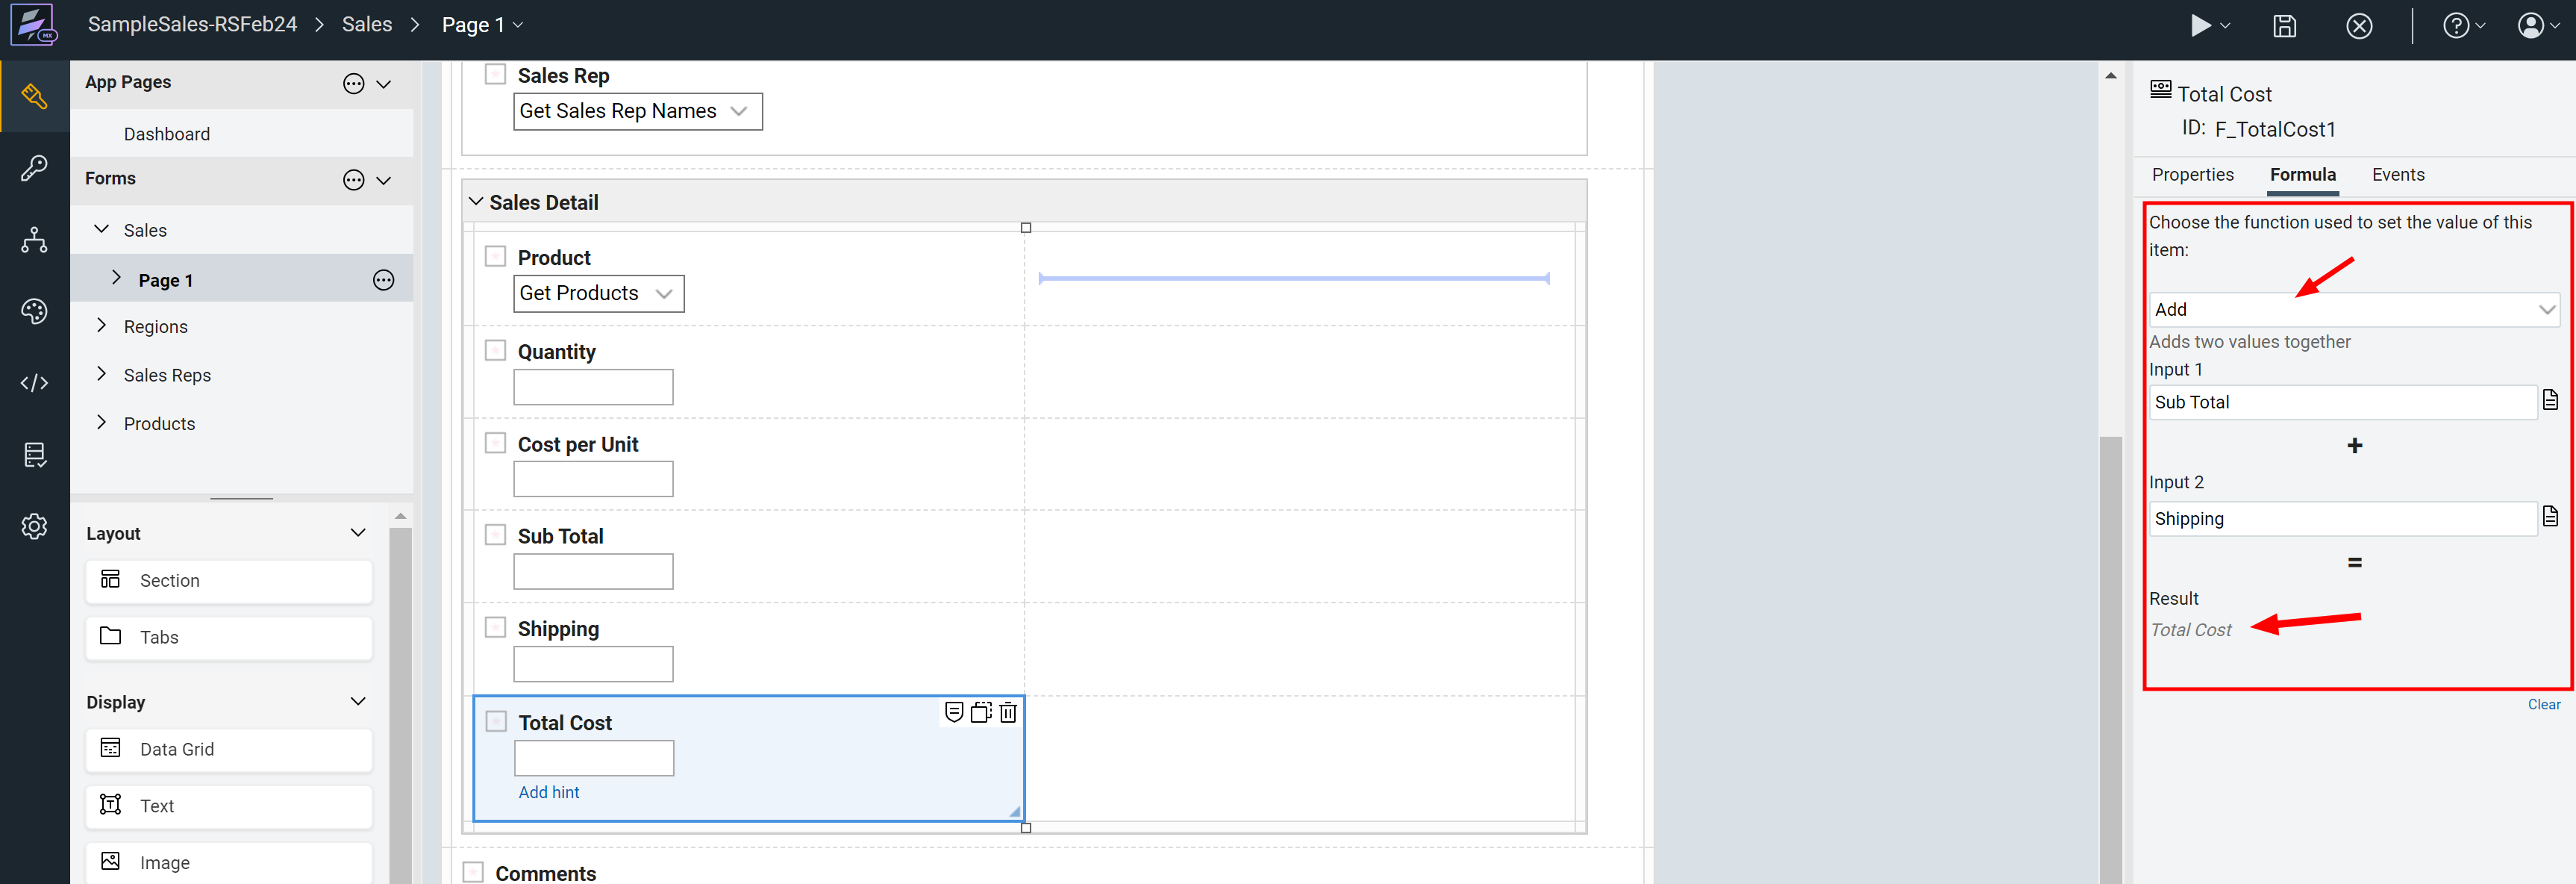
Phase 7 - Formula
You can see formula associated which can automatically compute values like adding "Sub Total" and "Shipping" to get "Total Cost"
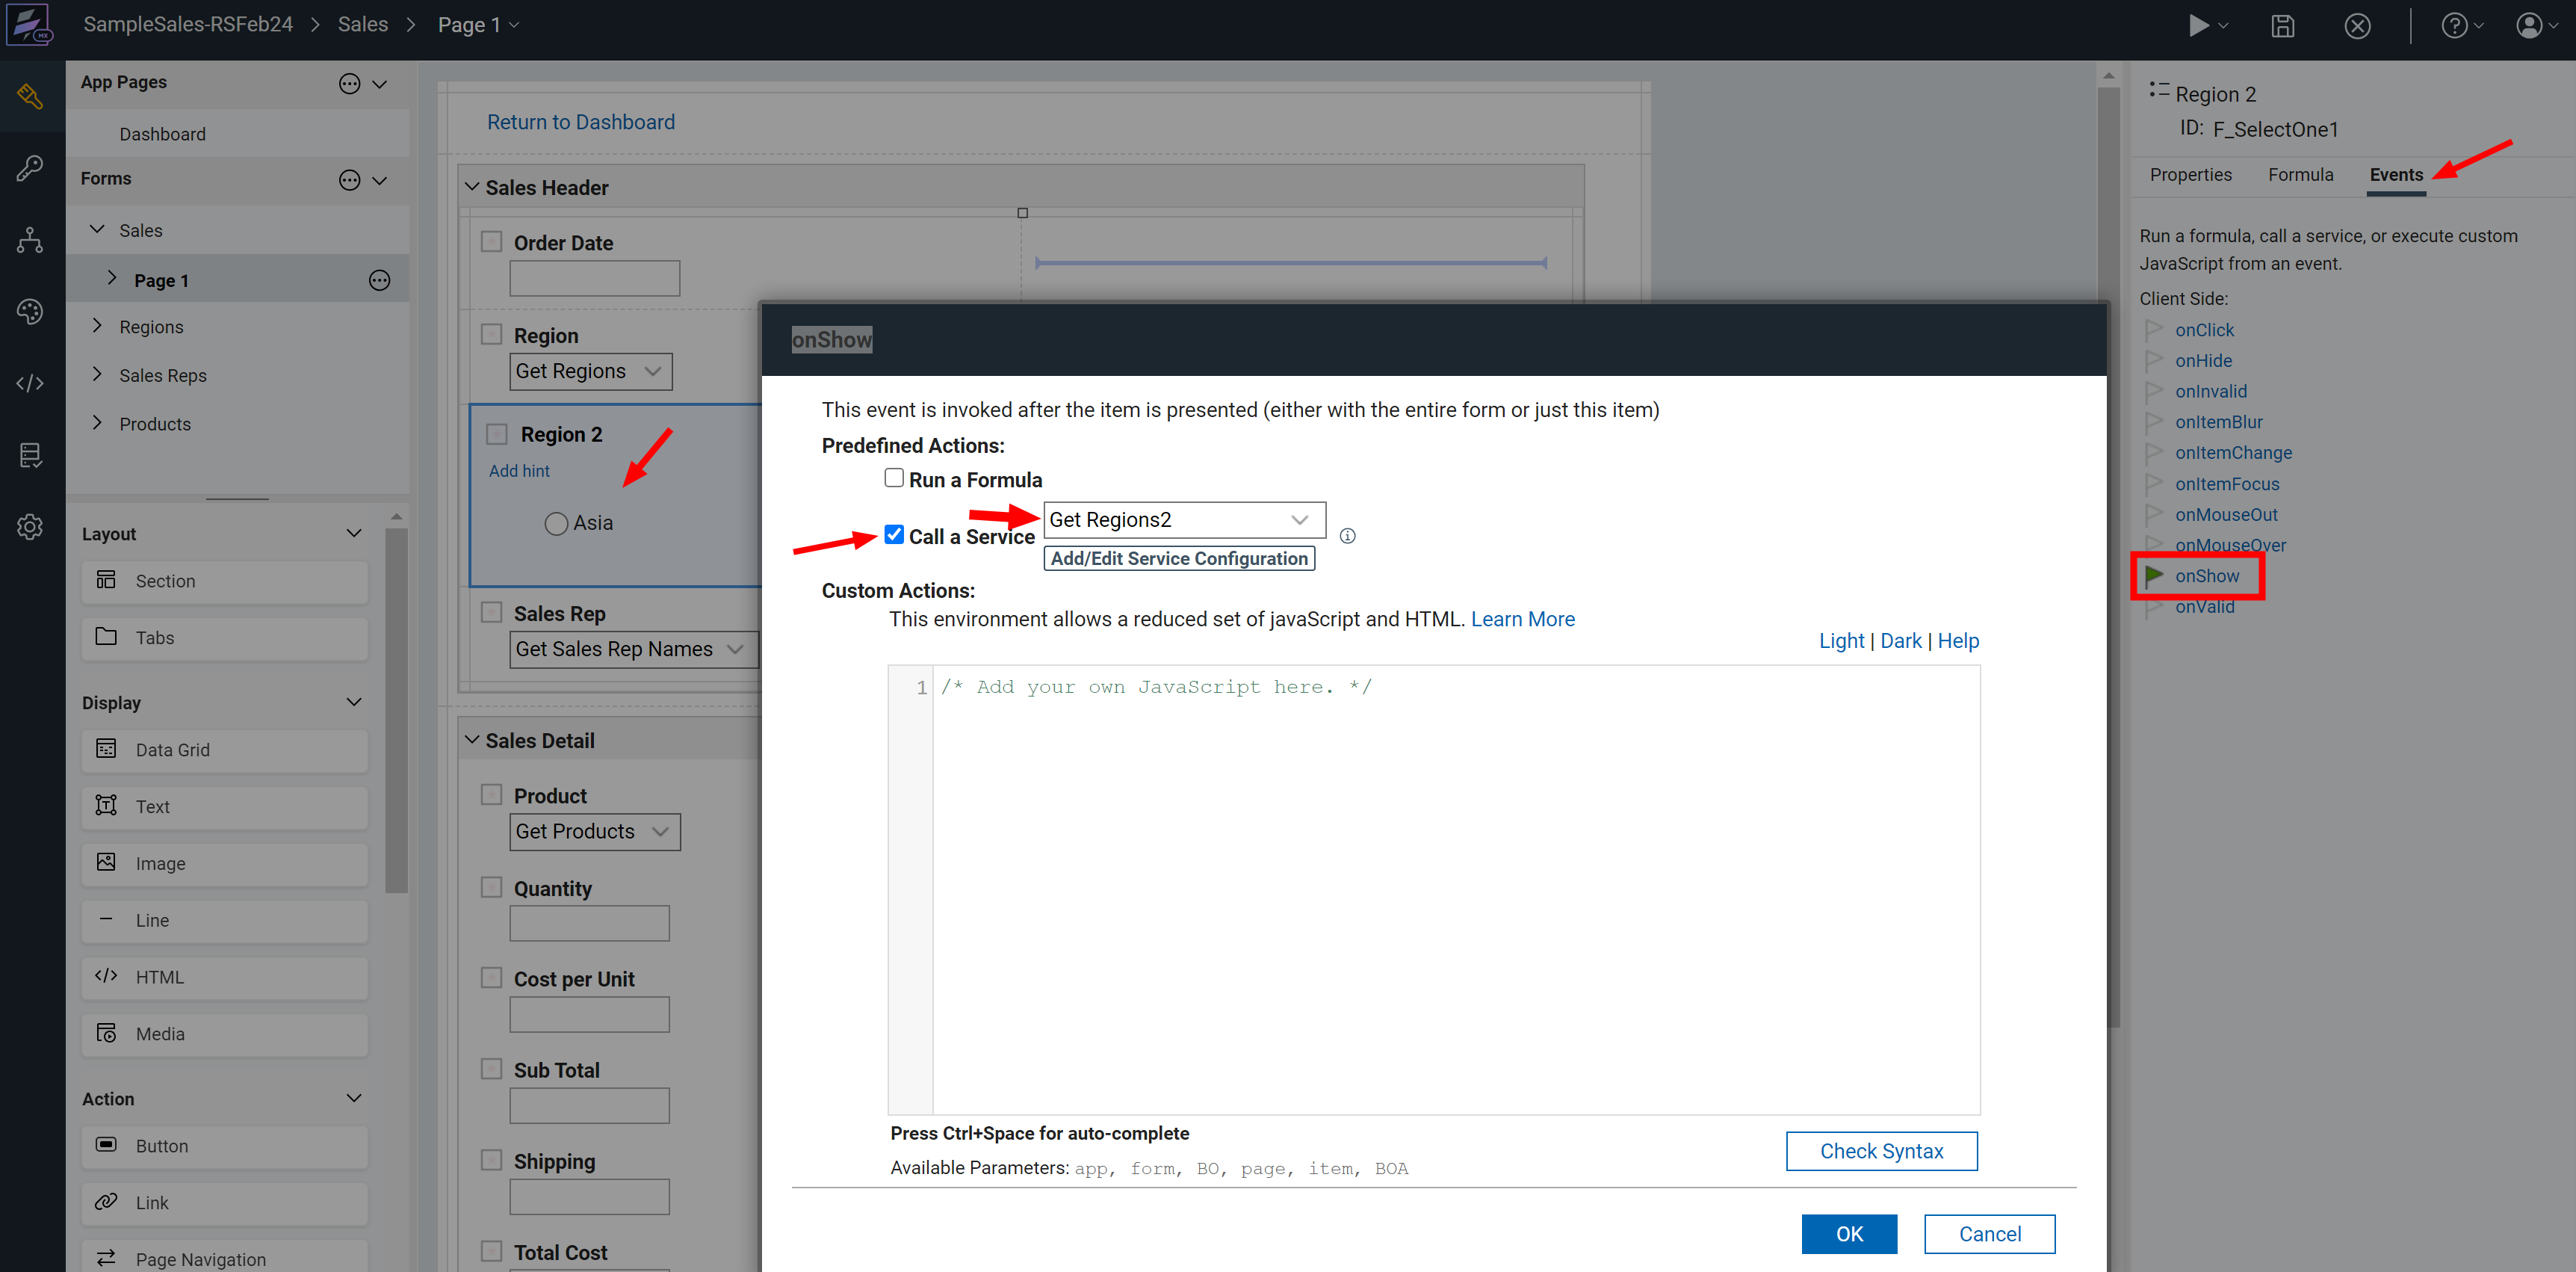
Phase 8 - Events
You can also configure events which will allow you call a service like 'onShow' event you can a service which populates all the Regions from another Form.
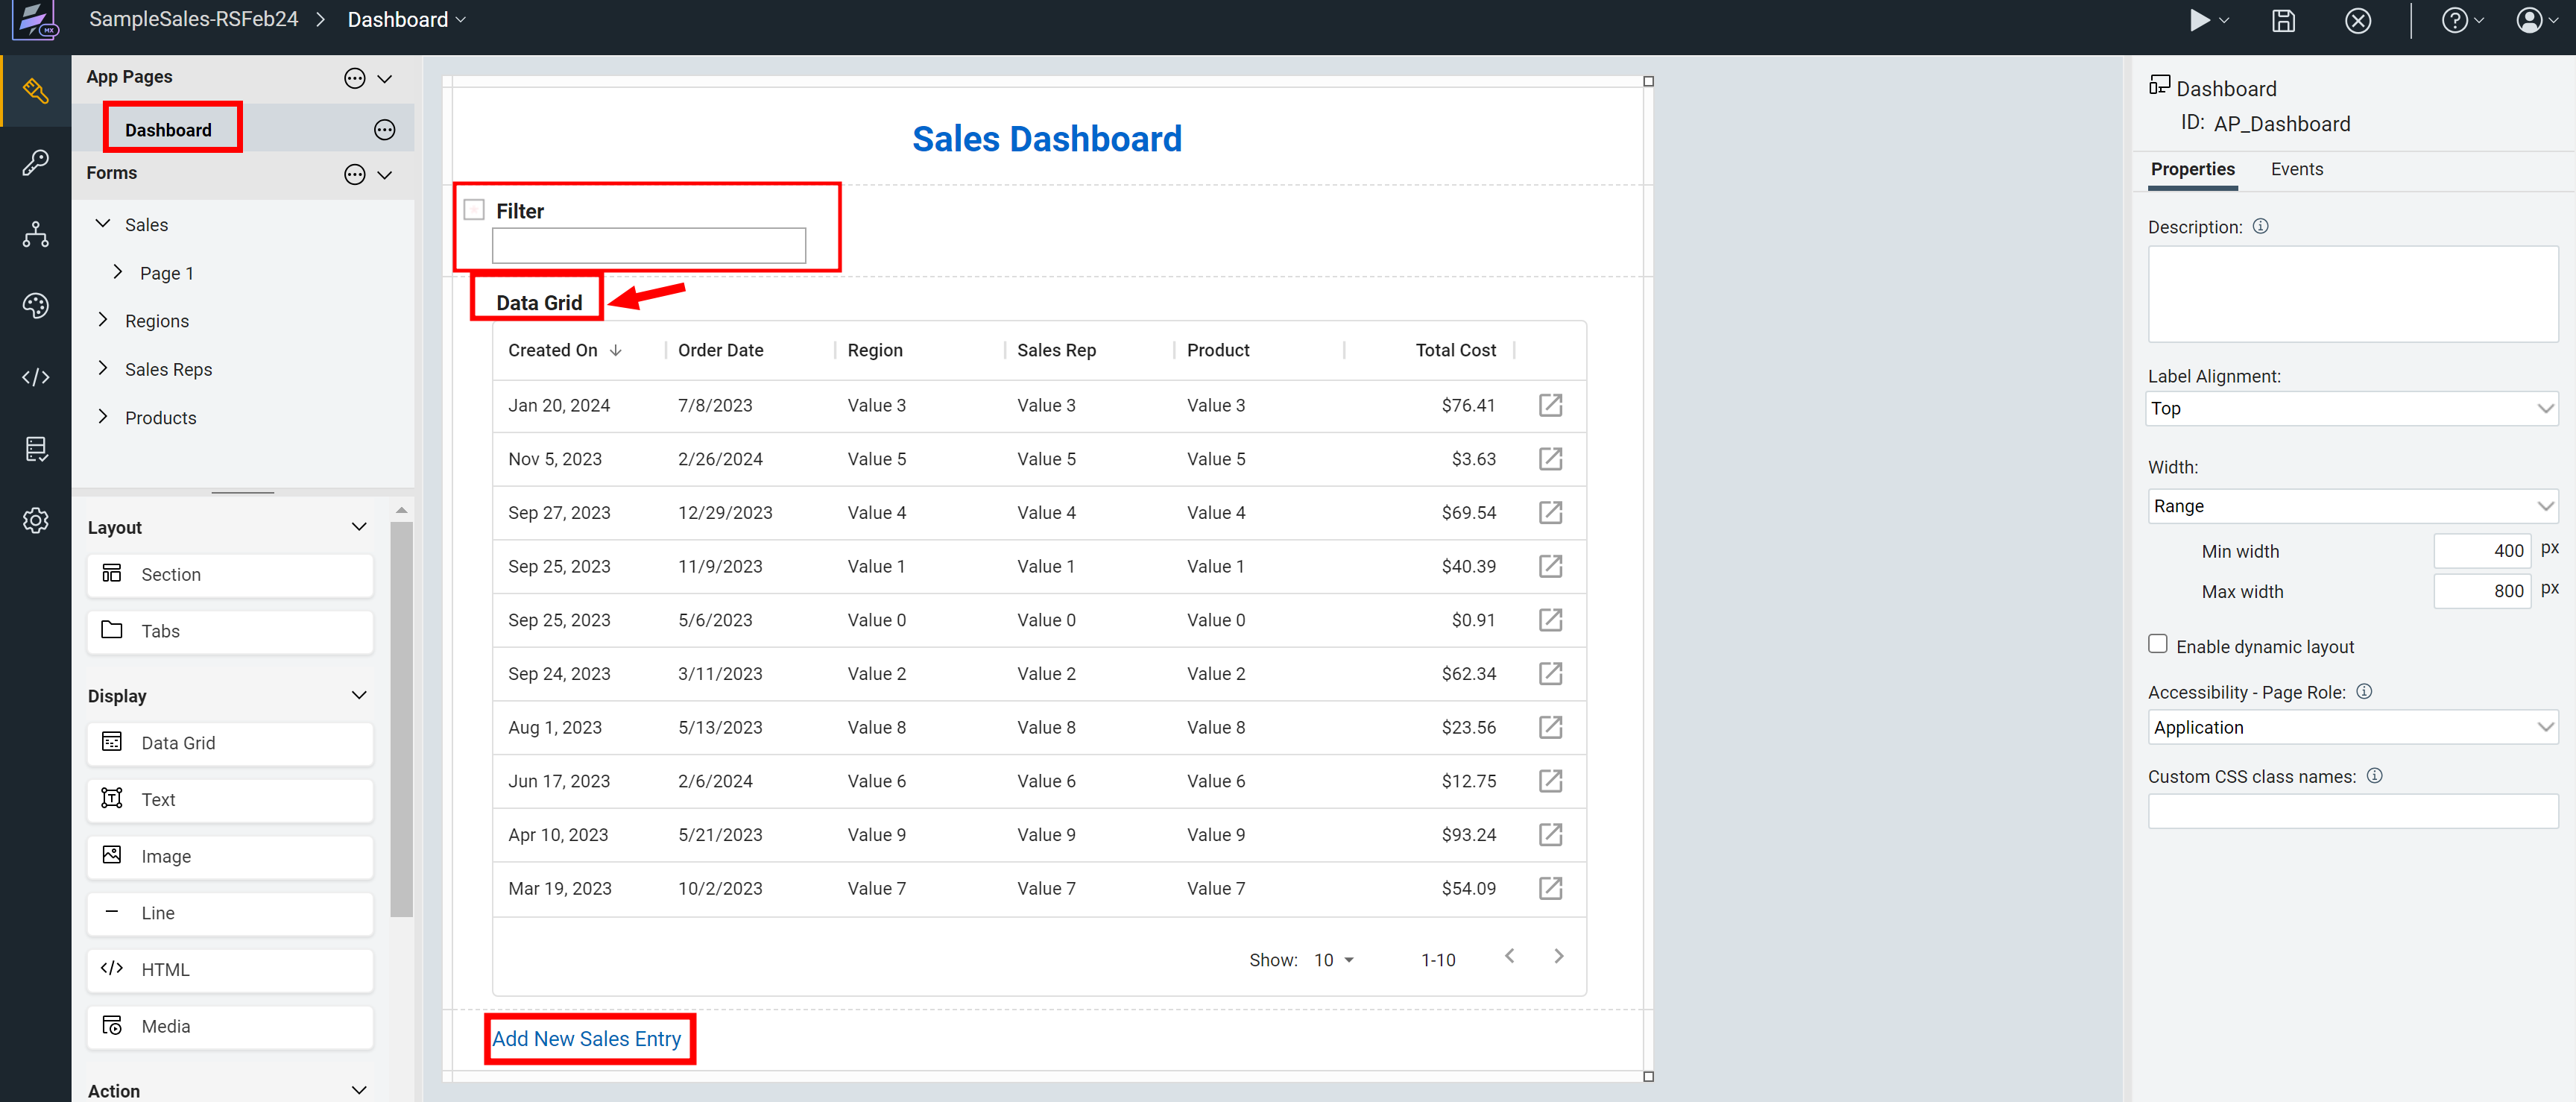
Phase 9 - Dashboard or Landing Page
You can build a Dashboard or a Landing Page for your Application. This page can have links and also a datagrid to show data values which can function like a View. You can create Action or Links to allow users to create new entries.
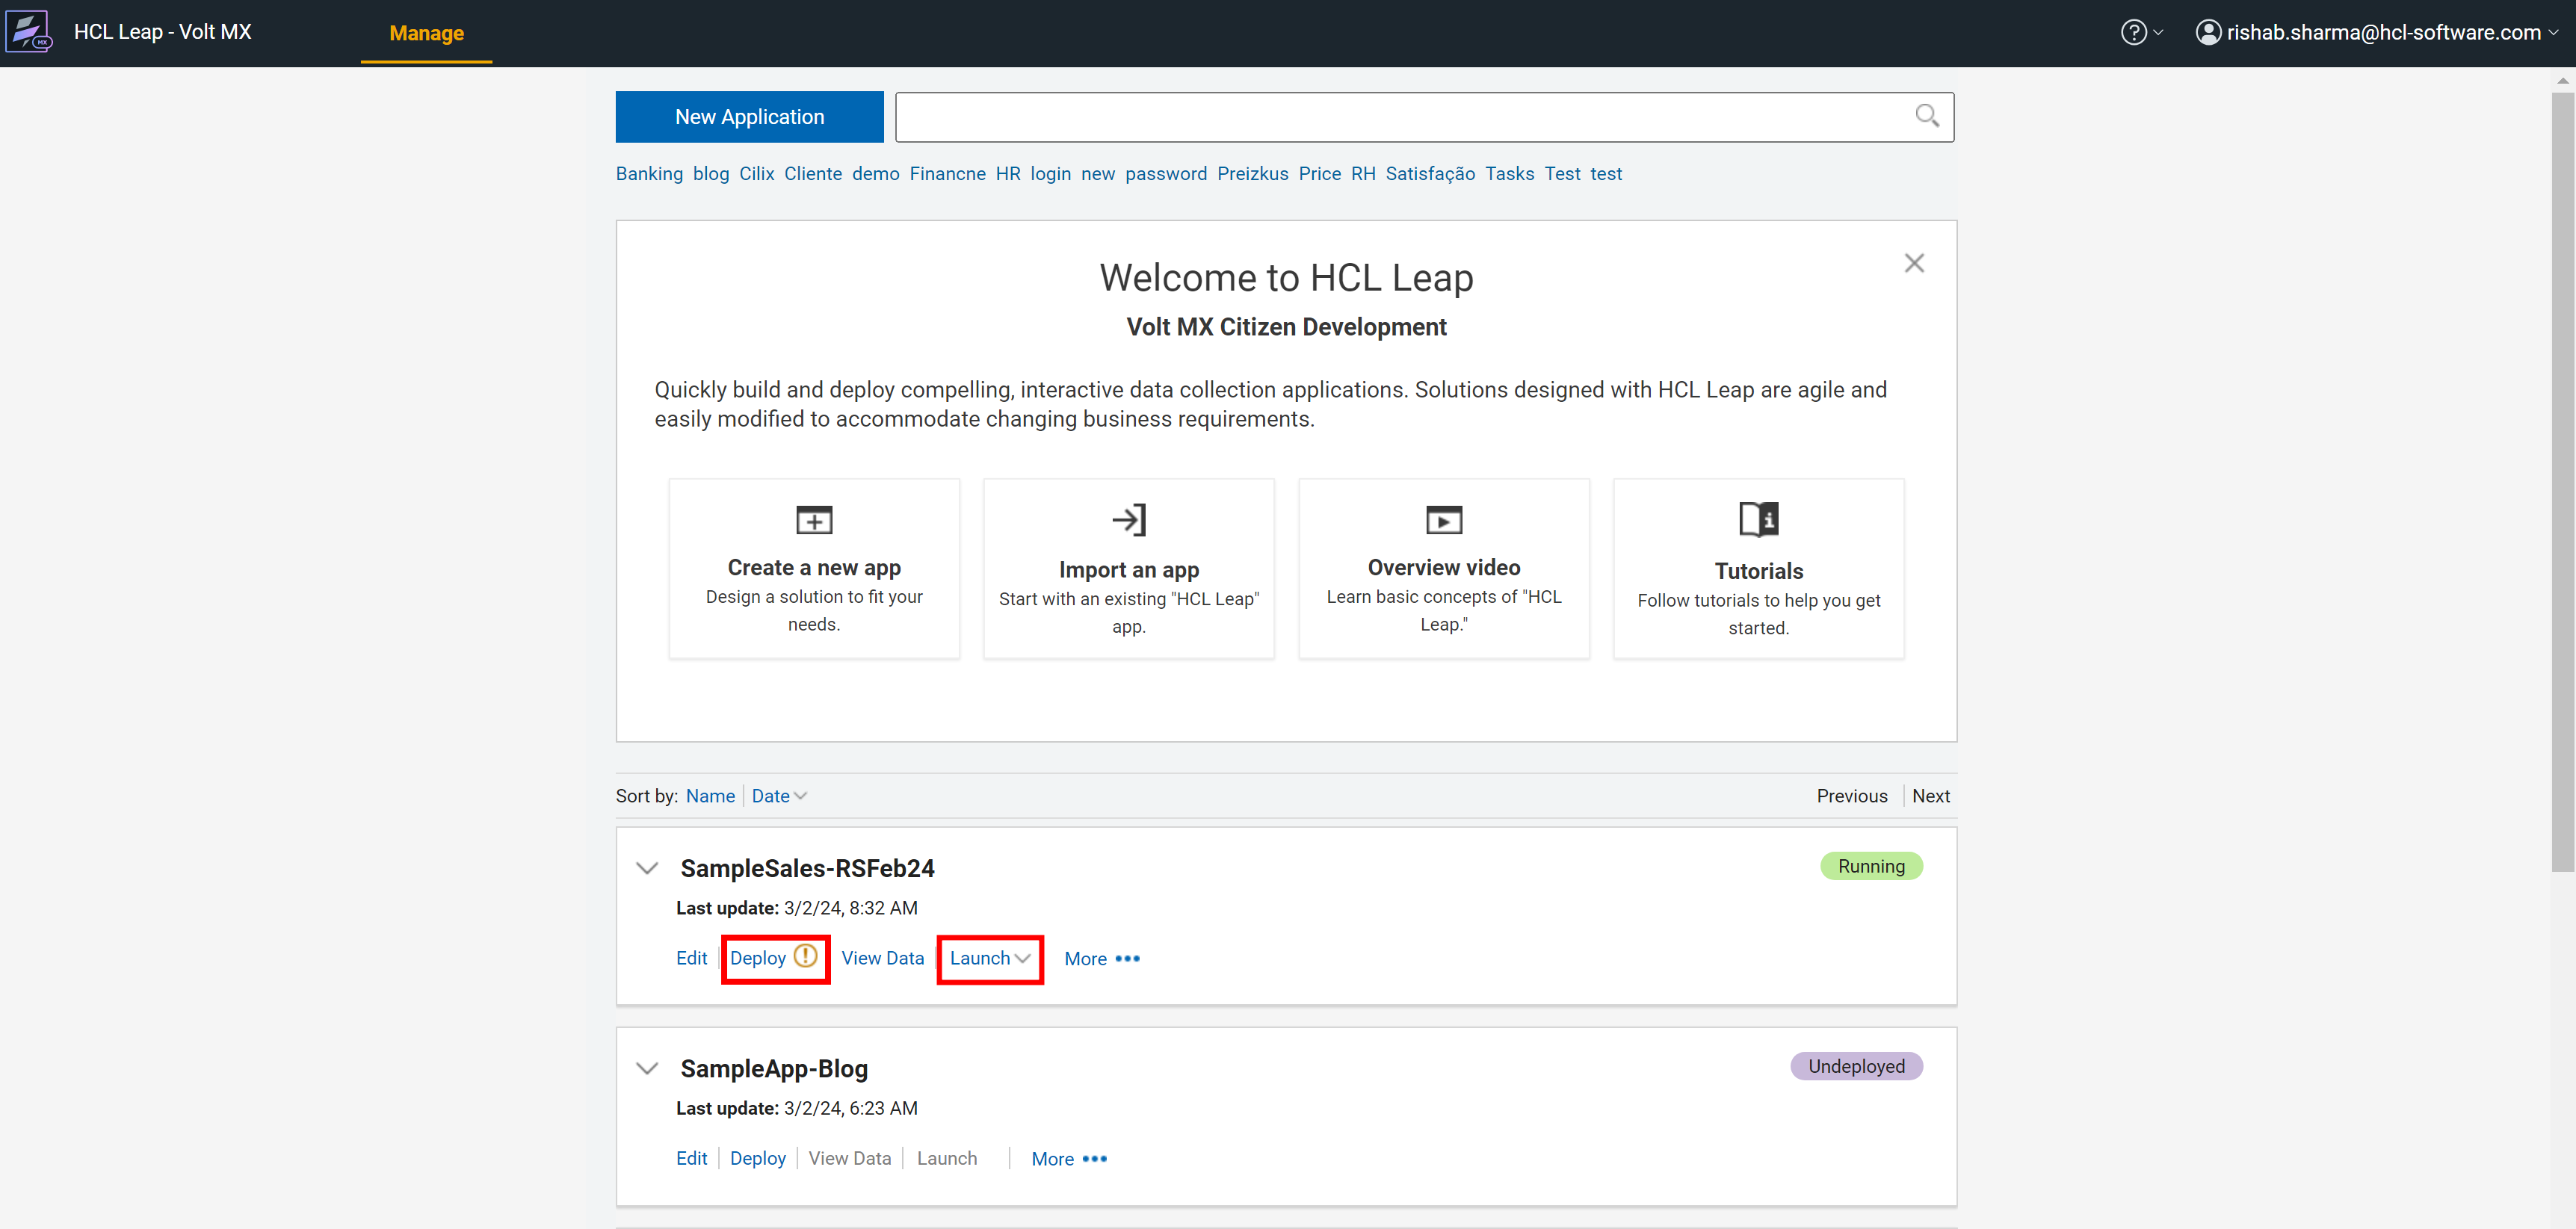
Phase 10 - Deploy / Launch Application
The final application will be now ready to be deployed and you can manage other aspects of the same.
Closing and Followup
Self Learning Courses for HCL Leap - HCL Software University Link
HCL Leap Sandbox - Trial Account
This is the fifth article on this topic. Next Article we shall explore how to build services for lookup and other aspects of building a citizen developer application using HCL Leap. Look out for another one next week. Till then happy reading and reach out to me if you would want more information..